
How to Install a Durable Concrete Driveway: Step-by-Step Guide for San Diego Properties
Most concrete driveways crack or fail within a few years because critical steps get overlooked. If you want a durable concrete driveway that stands up to San Diego’s climate and daily wear, it starts with proper subgrade preparation, rebar reinforcement, and expert finishing. This step-by-step guide walks you through the concrete driveway installation process so you know what to expect—and when you’re ready, CalCleanSeal’s licensed, bonded, and insured team can provide a free estimate San Diego homeowners trust. For more detailed information on the process, check out this guide to installing a concrete driveway.
Preparing Your Site
Before you can enjoy a durable driveway, your site needs proper preparation. This step is crucial to ensuring a long-lasting, crack-free surface.
Site Evaluation and Planning
Start with a thorough site evaluation. Walk around the area where you plan to install the driveway. Look for any potential problems like tree roots or drainage issues. These can affect your driveway’s longevity. Once identified, plan accordingly. You may need to remove obstacles or adjust your layout to avoid them. Consulting a professional can help you spot issues you might miss.
Next, sketch a plan. Determine the driveway’s width, length, and shape. Ensure it suits your property’s layout and your vehicle needs. A well-planned driveway not only looks good but also functions effectively.
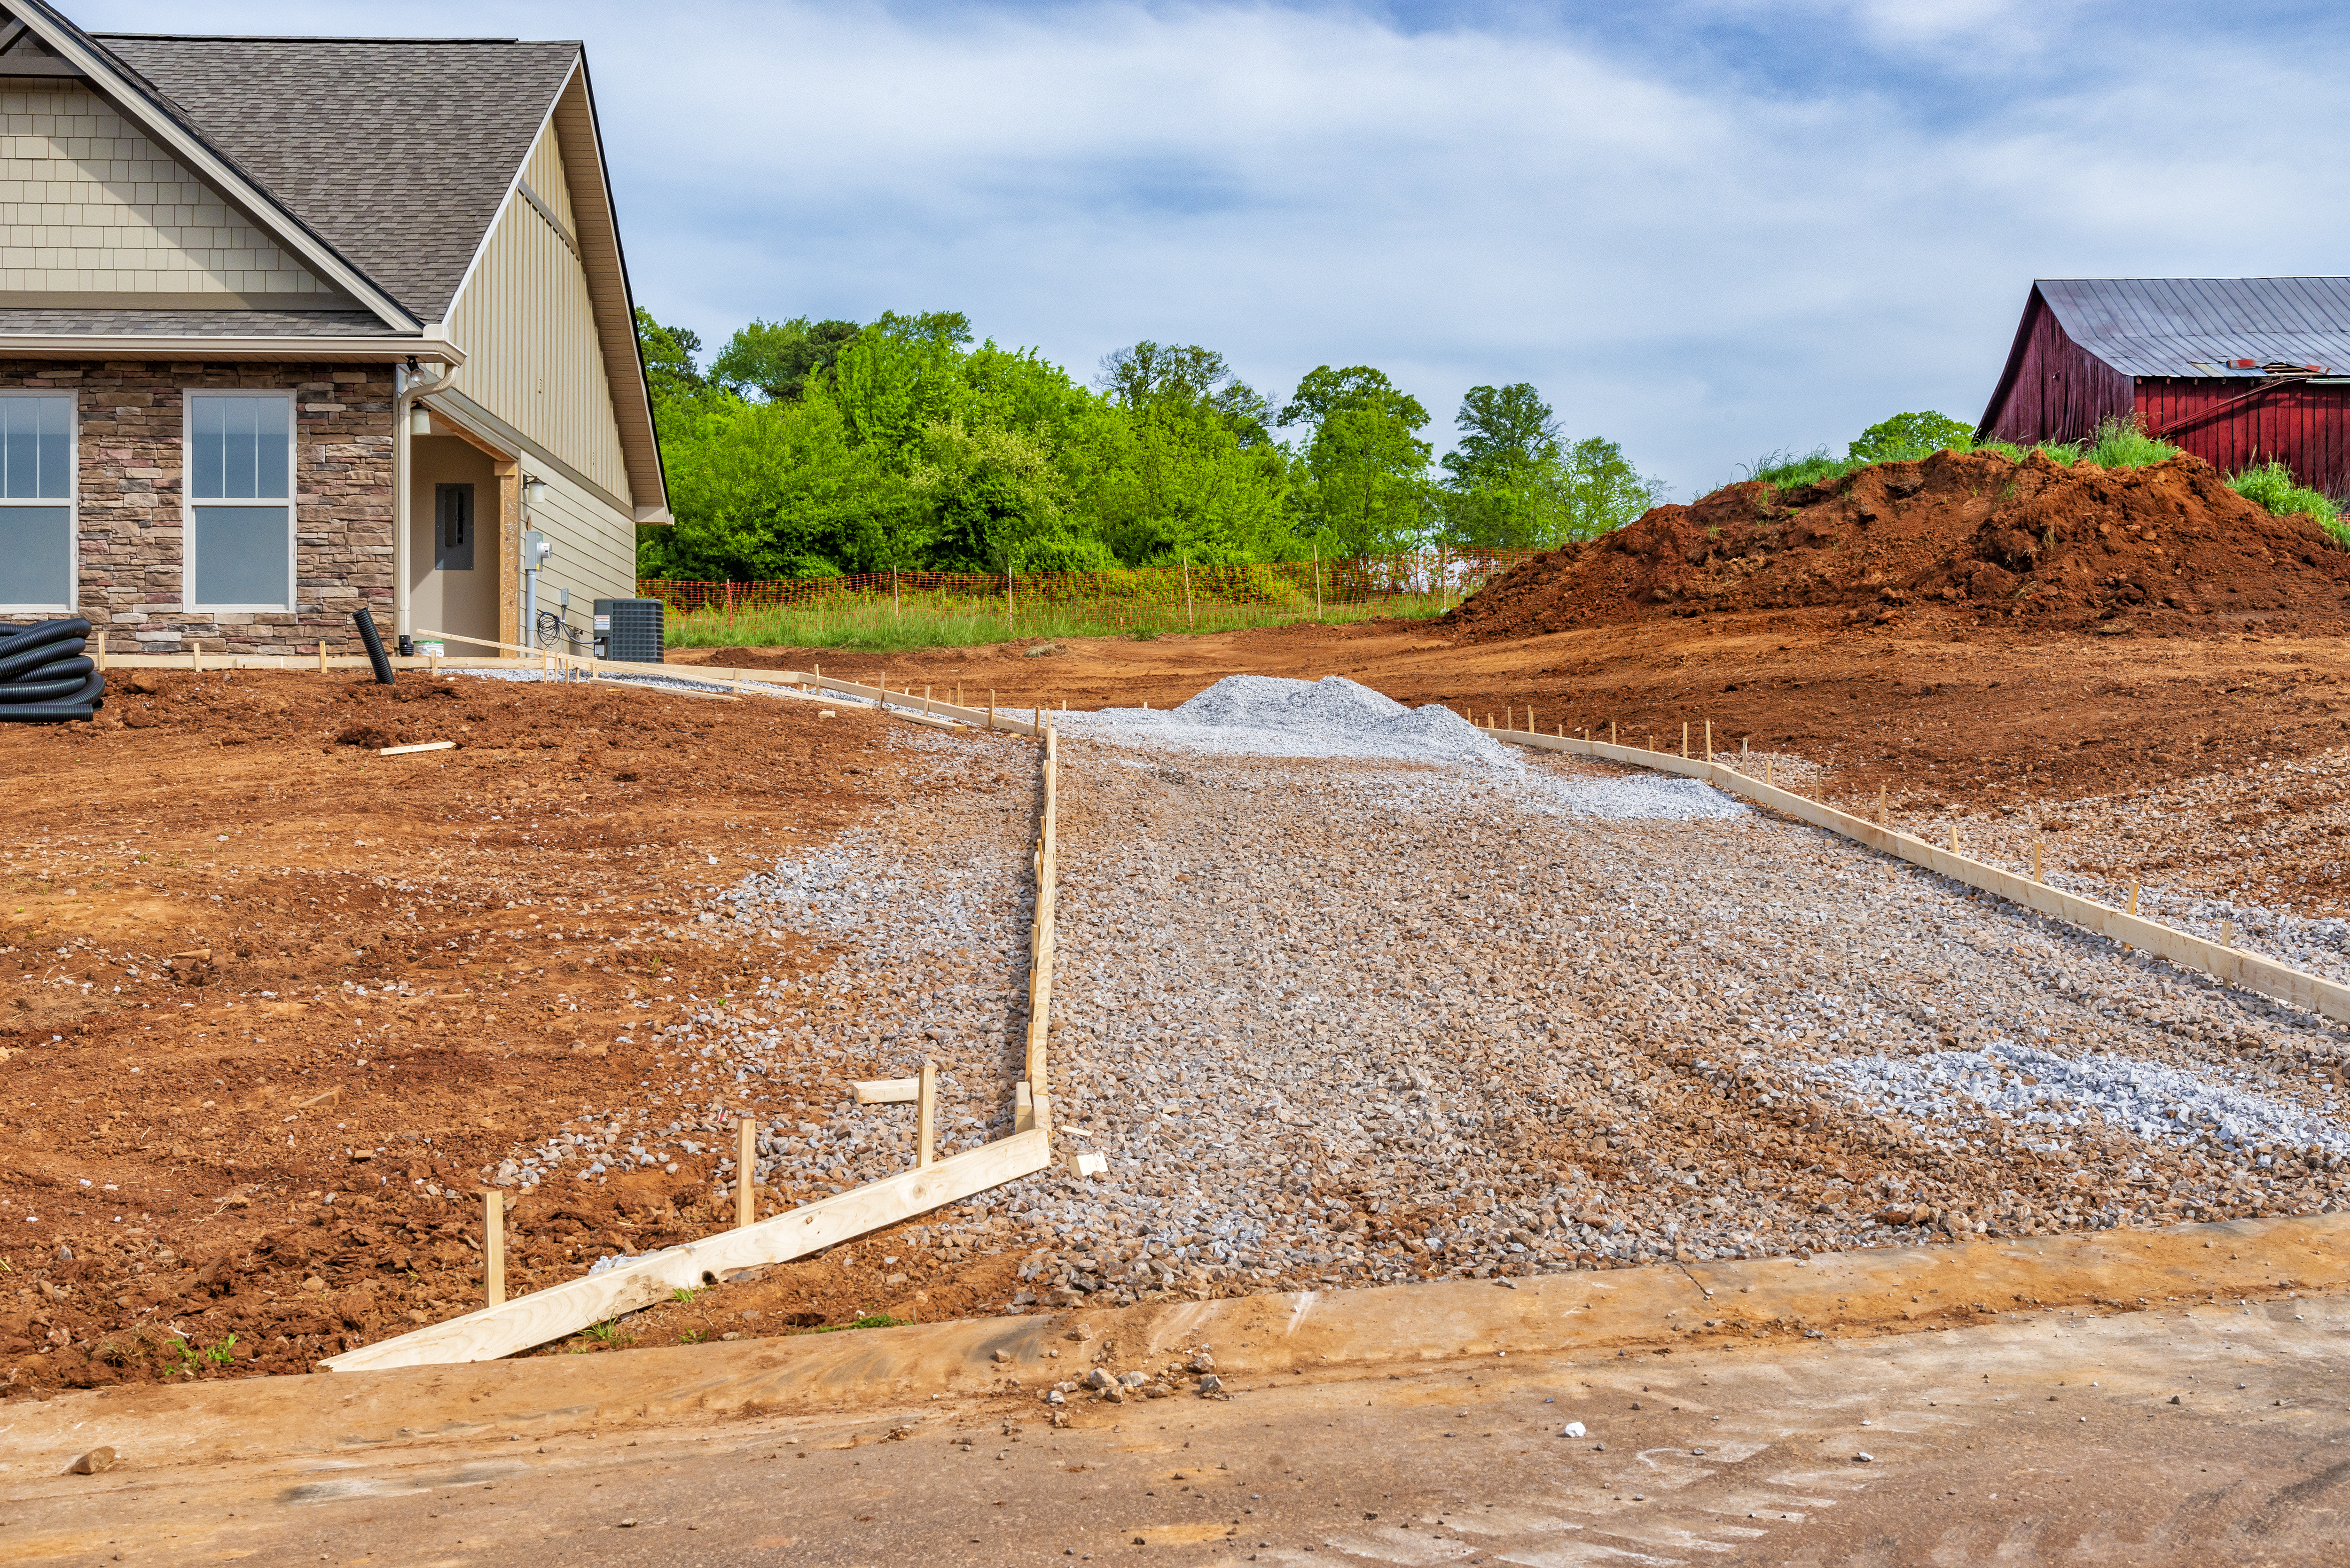
Grading and Subgrade Preparation
Grading is vital for a stable driveway. It involves leveling the ground to ensure proper water drainage. Poor grading can lead to water pooling, which damages concrete over time. Use a slope of about 2% for optimal drainage. This means your driveway should drop 2 feet for every 100 feet of length.
After grading, focus on subgrade preparation. This involves compacting the soil where your driveway will sit. A well-compacted subgrade prevents settling and cracking. Remove soft spots and fill them with gravel. Ensure the entire area is firm and level. This solid foundation supports your driveway for years.
Installing Your Concrete Driveway
With your site ready, it’s time to install your concrete driveway. This phase requires attention to detail to ensure strength and durability.
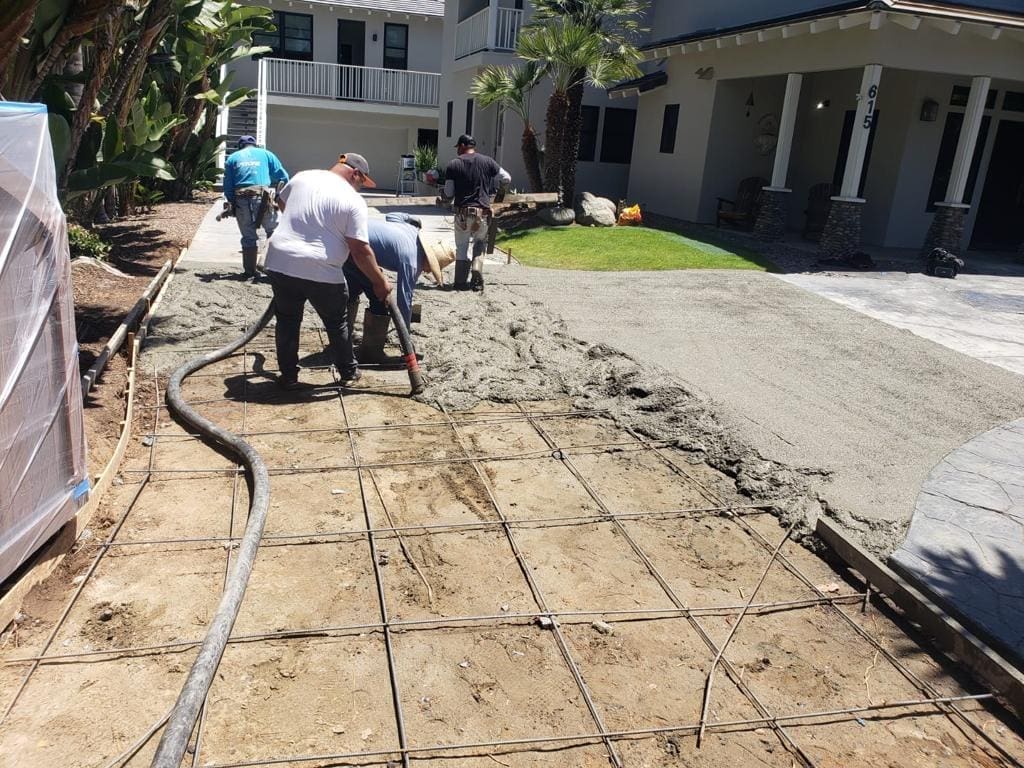
Formwork and Rebar Reinforcement
Start by setting up formwork. These are wooden or metal frames that hold the concrete in place as it cures. Ensure they are sturdy and level. Secure them with stakes to prevent movement during pouring.
Next, lay down the rebar. Rebar reinforcement strengthens your driveway, reducing the risk of cracks. Space the rebar about 12 inches apart and elevate it slightly off the ground using chairs. This ensures it sits in the middle of the concrete slab for maximum support.
Quality Mix Placement and Finishing
Now, it’s time to pour the concrete. Use a quality mix tailored for your local climate. In San Diego, consider a mix designed to handle temperature fluctuations and moisture levels. Pour the concrete evenly across the formwork, starting at one end and working your way to the other.
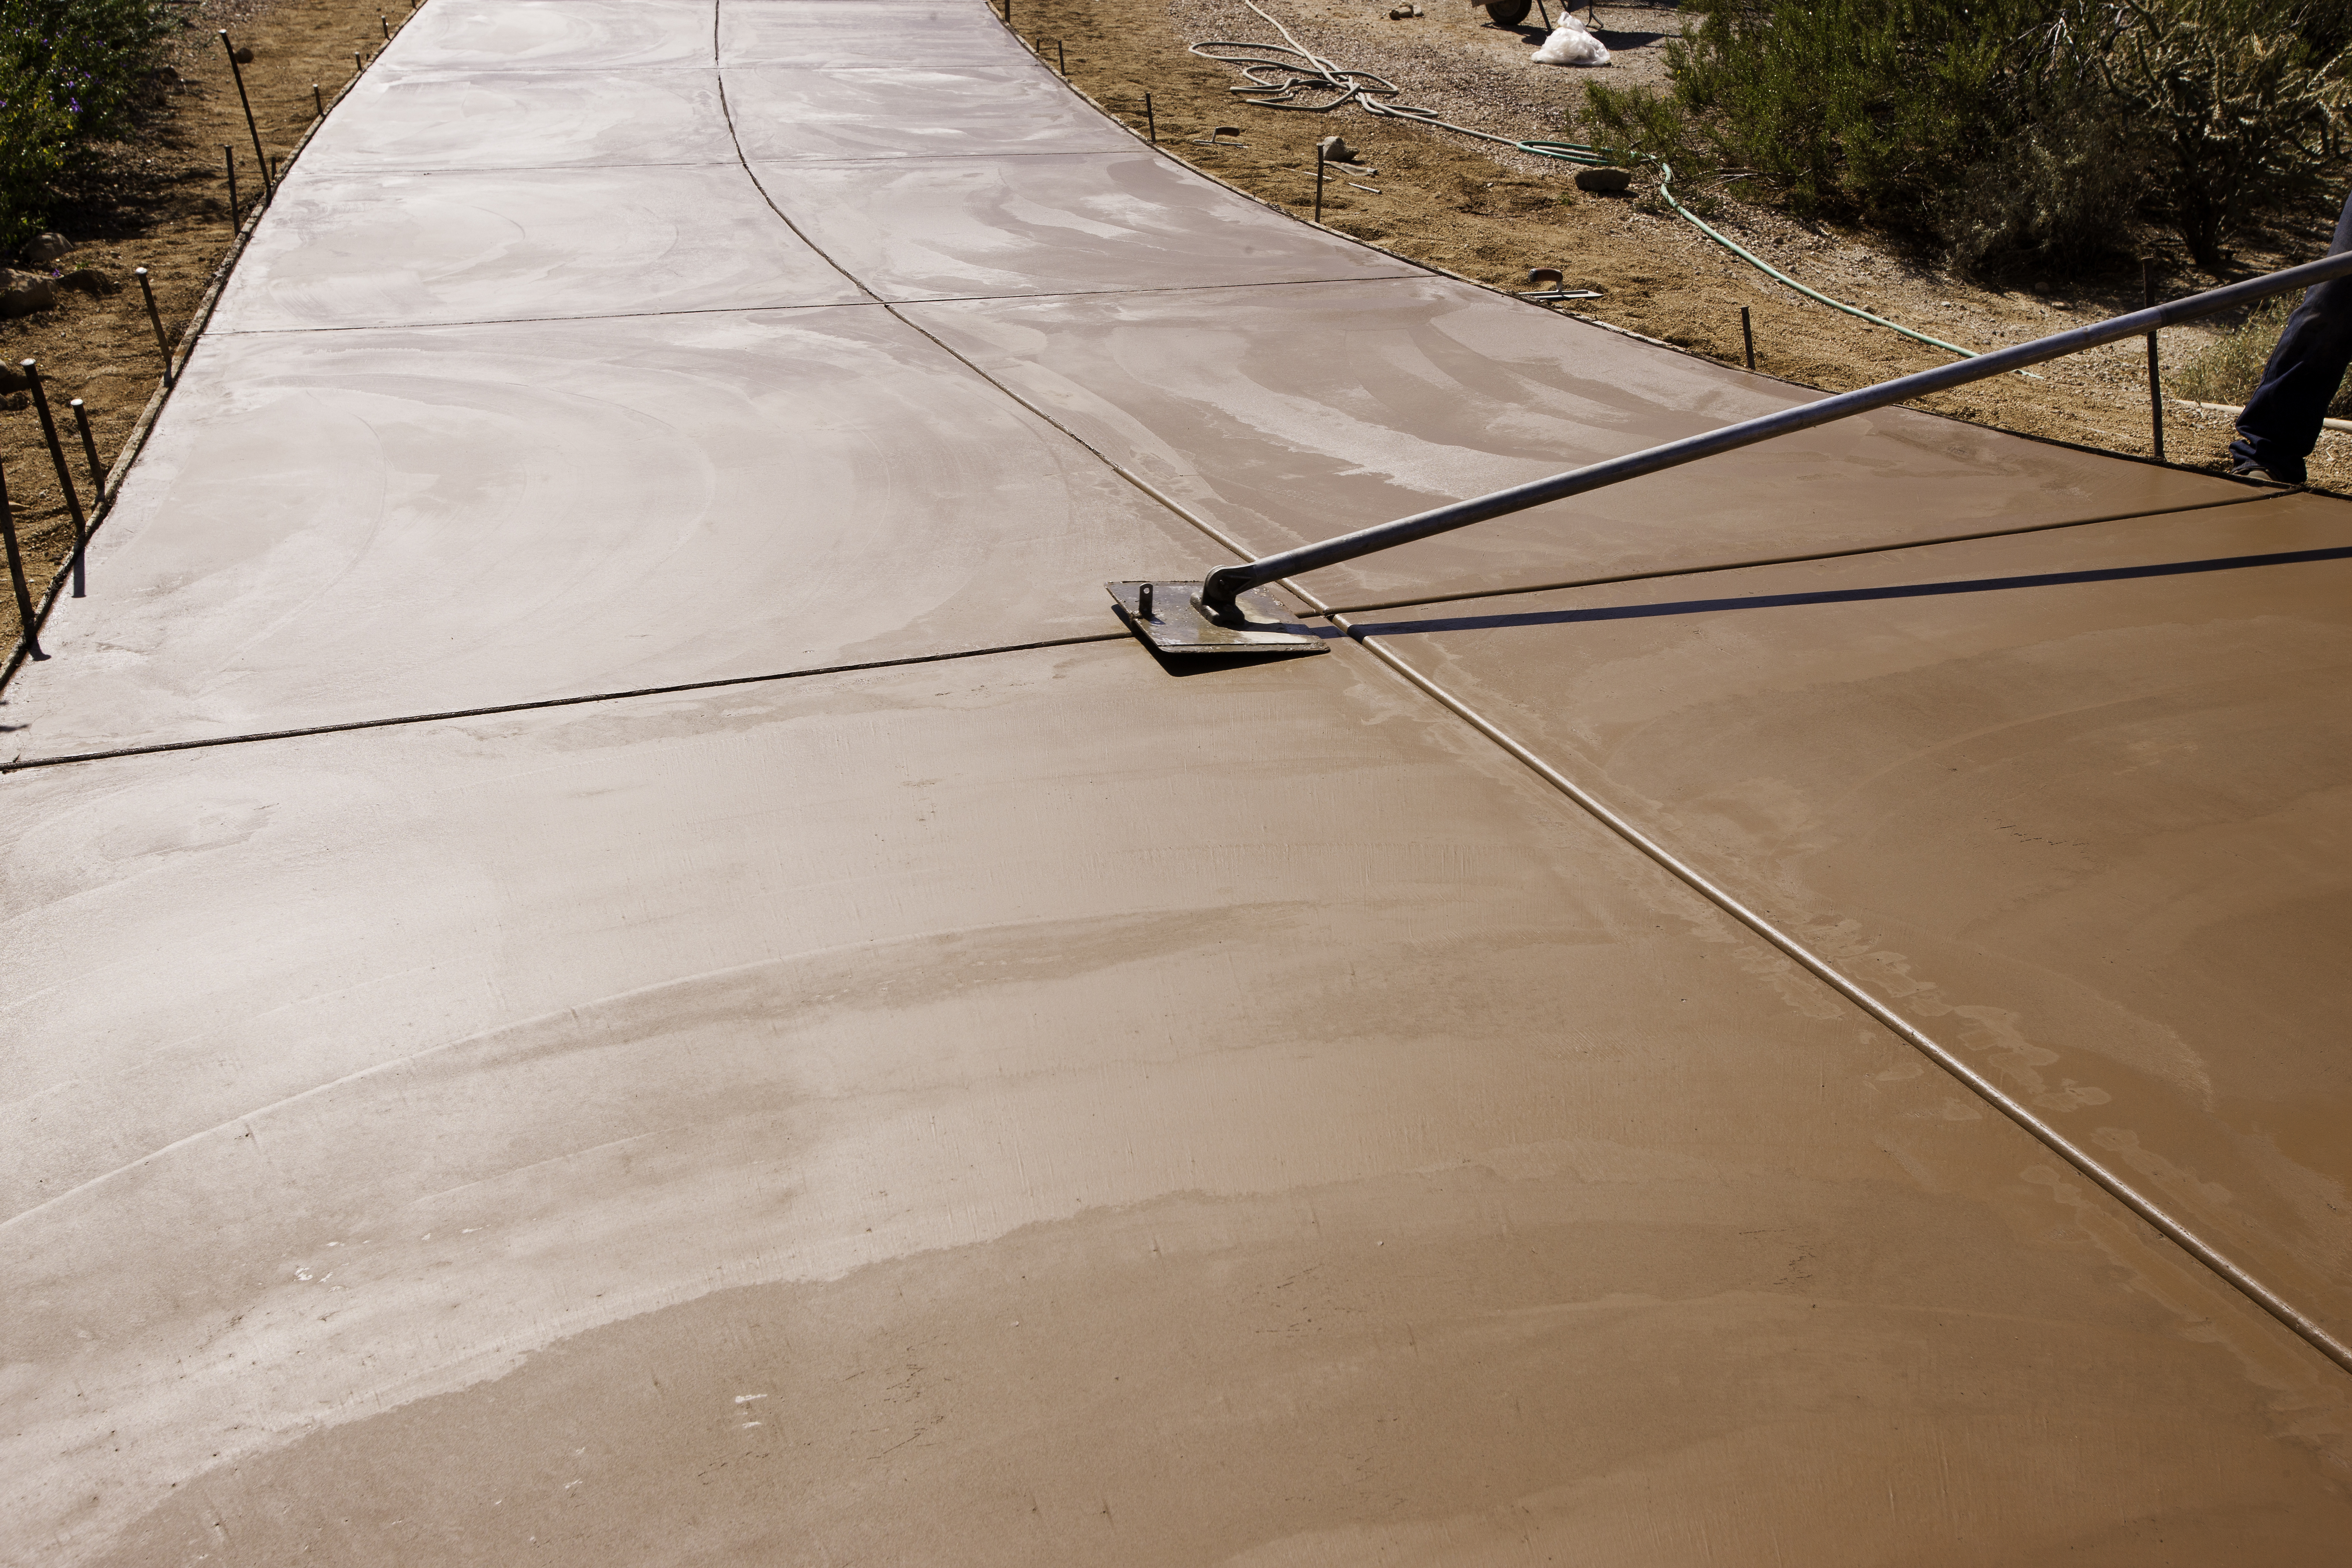
Once poured, use a screed board to level the surface. Follow up with a bull float to smooth out the concrete. This process removes air pockets and ensures a even finish. After floating, let the concrete set until the surface sheen disappears. Then, apply a trowel for a smooth finish.
Final Touches for Longevity
After installation, focus on final touches that enhance durability. These steps prevent cracks and maintain your driveway’s appearance.
Control Joints and Concrete Curing
Control joints are critical. They allow your driveway to expand and contract without cracking. Cut these joints into the concrete once it’s partially set. Space them no more than 10 feet apart.
Next, ensure proper curing. Curing strengthens the concrete. Keep it moist for at least a week after pouring. This can be done by covering it with wet burlap or using a curing compound. Proper curing prevents premature cracking and enhances the driveway’s lifespan.
Driveway Sealing and Maintenance
Sealing your driveway adds a protective layer. It guards against stains, moisture, and wear. Choose a sealant suited for your concrete’s finish. Apply it once the concrete has fully cured, usually after 30 days.
Regular maintenance keeps your driveway in top condition. Clean it periodically to remove debris and stains. Inspect for cracks or damage and address them promptly. By following these steps, you ensure your driveway remains durable and attractive for years. For more on sealing and maintenance, consider exploring this comprehensive guide.
In conclusion, a durable concrete driveway requires meticulous planning and execution. From site preparation to final sealing, each step is critical. If you’re ready to transform your property with a professional installation, reach out to CalCleanSeal. Our expert team is here to ensure your driveway stands the test of time.


