Backyard Concrete Patio Restoration: Transforming Your Outdoor Space
Restoring a backyard concrete patio can transform your outdoor space. It enhances your home’s value and provides a beautiful area for relaxation and entertainment. This guide will walk you through the steps to achieve a stunning patio restoration. Whether your patio is cracked, stained, or outdated, we have the necessary solutions.
Assessing the Damage:
Before starting any restoration project, assess the current state of your patio. Look for cracks, stains, and uneven surfaces. Check for any drainage issues that might have caused damage. Understanding the extent of the damage helps in planning the restoration process.
Cracks and Holes:
Cracks and holes are common in concrete patios. Small cracks can be repaired quickly, but larger ones require professional help. If left untreated, these can worsen over time.
Stains and Discoloration:
Over time, patios can develop stains from dirt, mold, and spills. Discoloration can make your patio look old and neglected. Identifying the types of stains will help you choose the correct cleaning method.
Uneven Surfaces:
An uneven patio can be a tripping hazard and cause water pooling, leading to further damage. Could you check for any areas that are not level and mark them for repair?
Cleaning the Patio:
A thorough cleaning is the first step in the restoration process. It removes dirt, stains, and debris, preparing the surface for further treatment. Here’s how you can clean your concrete patio effectively:
Sweep and Wash:
Start by sweeping away loose dirt and debris. Use a garden hose to wash the surface. This will reveal any hidden stains and make the next steps easier.
Remove Stains:
Use a concrete cleaner to tackle tough stains. A degreaser can be very effective for oil stains. Apply the cleaner, scrub with a stiff brush, and rinse thoroughly.
Pressure Washing and Acid wash:
For deep cleaning, consider using a pressure washer. It can remove stubborn dirt and grime. However, be careful not to damage the concrete with too high pressure.
Repairing Cracks and Holes:
Once the patio is clean, it’s time to repair any cracks and holes. This step is crucial for preventing further damage and ensuring a smooth surface.
Fill Small Cracks:
For small cracks, use a concrete crack filler. Follow the product instructions for the best results. Smooth the filler with a trowel and let it dry completely.
Patch Large Cracks and Holes:
You might need a concrete patching compound for larger cracks and holes. Mix the compound according to the instructions and apply it to the damaged areas. Use a trowel to smooth the surface and let it cure as directed.
Level Uneven Areas:
You might need to use a self-leveling compound if significant uneven areas exist. This will help create a smooth and even surface, ready for the final finish.
Resurfacing the Patio:
Resurfacing your concrete patio can give it a fresh, new look. It involves applying a new layer of concrete over the existing surface. This step can hide imperfections and add decorative elements.
Prepare the Surface:
Ensure the patio is clean and dry before resurfacing. Apply a concrete bonding agent to help the new layer adhere properly.
Mix the Resurfacer:
Follow the instructions on the resurfacing product to mix it correctly. It should have a smooth, pourable consistency.
Apply the Resurfacer:
Pour it onto the patio and spread it evenly using a squeegee or trowel. Work quickly to ensure a smooth application. At this stage, you can add texture or patterns if desired.
Let it Cure: Follow the instructions for allowing the resurfacer to cure. To prevent damage, avoid using the patio until it is fully cured.
Sealing the Concrete:
Sealing your concrete patio protects it from future damage. It creates a barrier against water, stains, and UV rays. Sealing also enhances the concrete’s color and finish.
Choose a Sealer:
Different types of sealers are available, such as acrylic, epoxy, and polyurethane. Choose one that suits your needs and preferences.
Apply the Sealer:
Use a roller or sprayer to apply the sealer evenly over the surface. Follow the product instructions for the best results. For maximum protection, you’ll typically need to apply two coats.
Let it Dry: Allow the sealer to dry completely before using the patio. Depending on the product used, this might take a few hours to a couple of days.
Adding Decorative Elements:
To further enhance your backyard patio, could you consider adding decorative elements? These can include staining, stamping, or adding pavers.
Concrete Staining:
Staining can add color and depth to your patio. Choose from a variety of colors to match your outdoor décor. Apply the stain evenly and let it dry as per the instructions.
Concrete Stamping:
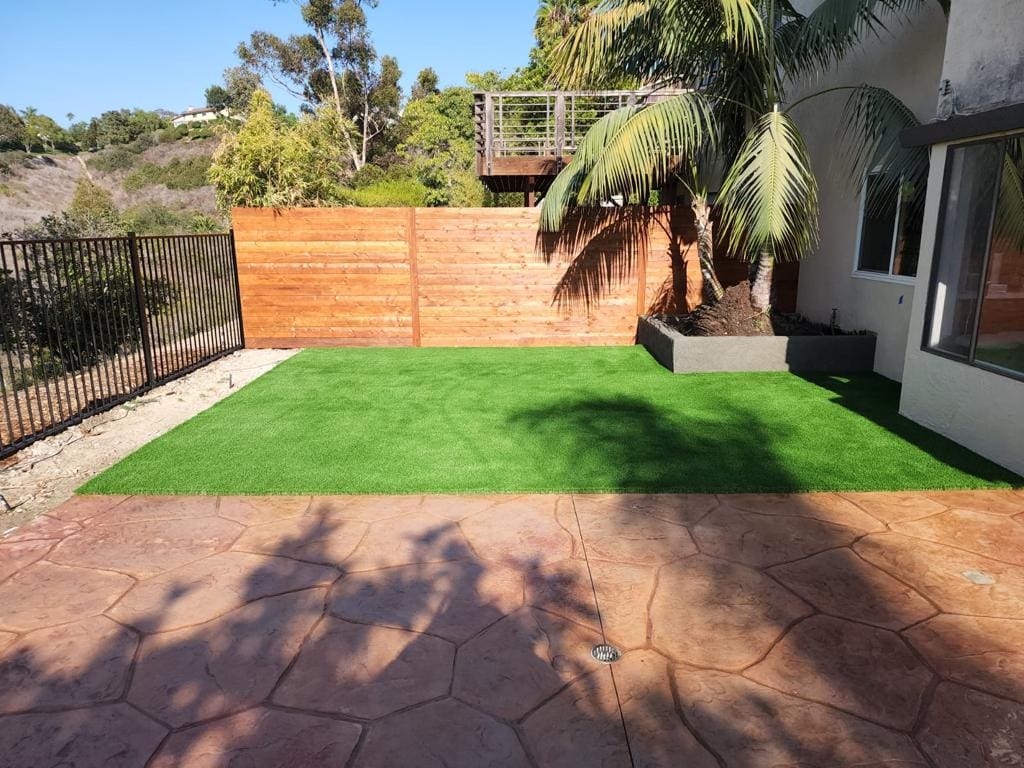
Stamping creates patterns and textures on the concrete surface. You can mimic the look of stone, brick, or tile. This process should be done while the resurfacer is still wet.
Adding Pavers: Incorporate pavers into your patio design for a unique look. They can be used to create borders or patterns and add texture and interest to the space.
Maintaining Your Restored Patio:
Regular maintenance is essential to keep your restored patio looking great. Here are some tips to help you maintain it:
Regular Cleaning:
Sweep and wash your patio regularly to free it from dirt and debris. This prevents stains and maintains its appearance.
Reapply Sealer:
Depending on the type of sealer used, you might need to reapply it every few years. This ensures ongoing protection against the elements.
Inspect for Damage:
Periodically inspect your patio for any signs of damage. Addressing minor issues promptly can prevent them from becoming more significant problems.
Call us: We can help Tel: 619-818-0113
Restoring your backyard concrete patio can transform your outdoor space. You can achieve a stunning result with proper assessment, cleaning, repair, and resurfacing. Adding decorative elements and maintaining the patio will ensure it remains beautiful for years. Follow these steps, and you’ll have a backyard retreat you can be proud of. Enjoy your new patio and the countless memories you’ll create there.


